
How to Set up SonarQube without Docker?
What is Sonarqube and Why is it Used?
Sonarqube is a Code Quality Assurance tool that collects and analyzes source code and provides reports for the code quality of your project. It combines static and dynamic analysis tools and enables quality to be measured continuously over time.
Sonarqube is an open-source platform used for continuous inspection of code quality. It is used to identify bugs, vulnerabilities, and code smells in a wide variety of programming languages and can be integrated with a variety of build and continuous integration systems.
You can run Sonarqube locally without docker or with it to achieve the following objectives:-
- Analyze code on-demand or with a scheduled job
- Automatically track technical debt
- Compare the quality of different branches or versions of code
- Write custom rules to identify specific issues
Difference Between Static and Dynamic Analysis:
- Static code analysis
- Done without executing any of the code.
- It is considered an automatic code review process that finds potential errors and poor coding practices. It is majorly used for metrics computation, which gives a rating of how well the code works.
- Dynamic Code Analysis
- Depends on codebase execution.
- Unlike static code analysis, It finds errors while programming execution.
Steps for the Installation of Sonar-scanner and Sonarqube Without Docker
Sonarqube can be installed and run on a machine without using Docker. Running Sonarqube without docker gives better control however it increases the amount of attention it requires.
Here is how to run Sonarqube without Docker on your system:-
Step 1:
Install Sonarqube Without Docker
- Download Sonarqube
- NOTE: Always download the community version of Sonarqube
- Download Sonarqube
- Download JVM
- Download the latest version of JVM
- Download the latest version of JVM
- Now, extract the zip of both the Sonarqube and JVM files. In our case, the path for Sonarqube is /Downloads/Sonarqube-9.7.1.62043.
Step 2:
Run the following commands to install the Node packages:
sudo apt-get update
sudo apt-get install unzip wget nodejs
Step 3:
Now, access the directory where you have Sonarqube installed. In our case, its
cd Downloads/Sonarqube-9.7.1.62043Step 3:
Now, access the directory where you have Sonarqube installed. In our case, its
cd Downloads/Sonarqube-9.7.1.62043- You can run the Sonarqube server using the command ./sonar.sh start and run it on localhost:9000.
- Now login with default credentials:
- Username – admin
- Password – admin
- Here, you can change your password.
- Now, if you get an authentication failed error while logging into Sonarqube, you can use the following command or else skip to the step 6.
curl -vu admin:admin -X POST "http://localhost:9000/api/users/change_password?login=admin&previousPassword=admin&password="123456""Step 4:
To use Sonarqube with sonar scanner, install the sonar-scanner packages. Also, unzip it using the below commands.
wget https://binaries.sonarsource.com/Distribution/sonar-scanner-cli/sonar-scanner-cli-4.2.0.1873-linux.zipunzip sonar-scanner-cli-4.2.0.1873-linux.zipStep 5:
Move this to opt directory using the command.
sudo mv sonar-scanner-4.2.0.1873-linux /opt/sonar-scannerStep 6:
The next step in installing Sonarqube without Docker is to edit the sonar-scanner.properties file.
sudo nano /opt/sonar-scanner/conf/sonar-scanner.propertieStep 7:
Uncomment the following lines
sonar.host.url=http://localhost:9000
sonar.sourceEncoding=UTF-8
Step 8:
Edit the /etc/profile.d
sudo nano /etc/profile.d/sonar-scanner.shStep 9:
To run Sonarqube server without Docker add the following lines to it.
#/bin/bash
export PATH="$PATH:/opt/sonar-scanner/bin"
Step 10:
The next step here would be to execute the following command:
cat /etc/profile.d/sonar-scanner.shTo set up the Sonarqube project, reboot your computer or use the source command to add the sonar scanner command to the PATH variable.
reboot
source /etc/profile.d/sonar-scanner.sh
Step 11:
Use the following command to verify if the PATH variable was changed as per your expectation.
env | grep PATHThe output should be something like as mentioned below –
PATH=/usr/local/sbin:/usr/local/bin:/usr/sbin:/usr/bin:/sbin:/bin:/usr/games:/usr/local/games:/snap/bin:/opt/sonar-scanner/binNow, your sonar scanner is all set, and you check the version using the command:
sonar-scanner -vAfter you run localhost:9000 and login with your credentials.
Create a new project.
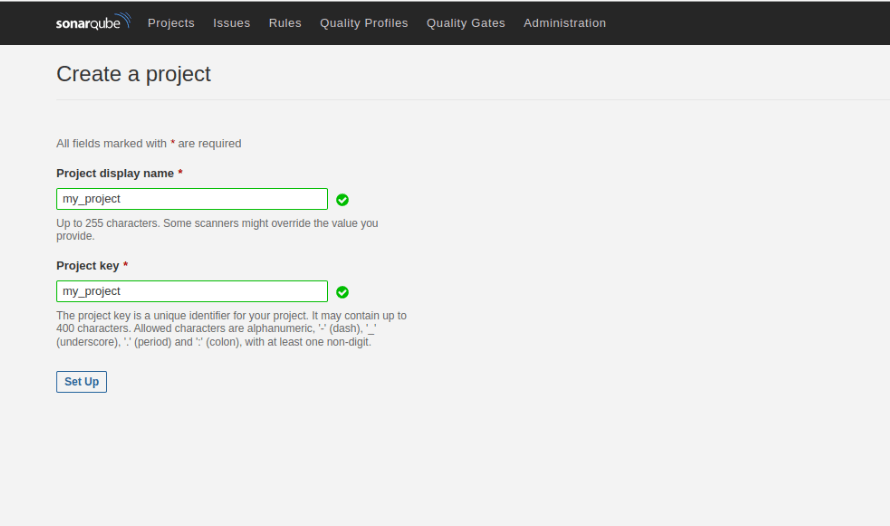
After that select a local project for its analysis.
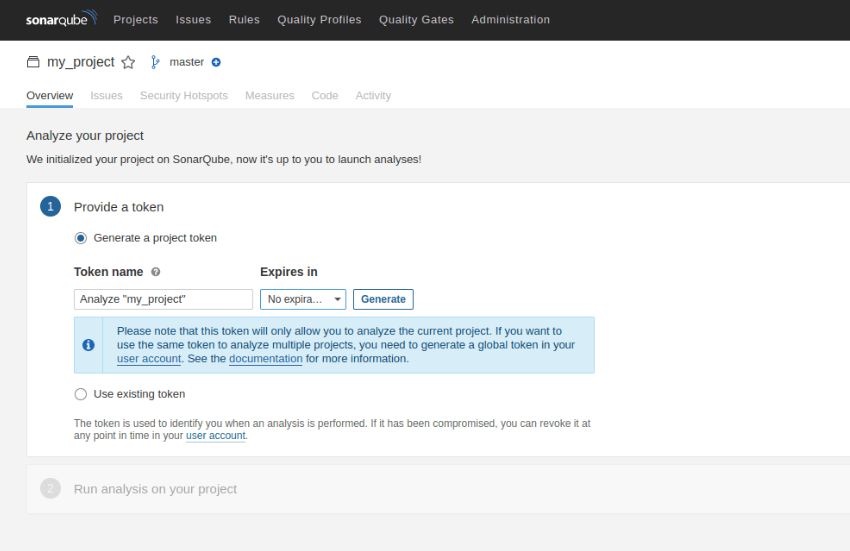
After that, generate a Sonarqube token as displayed below.
After you select the type of your OS, you will get the below Sonarqube dashboard.
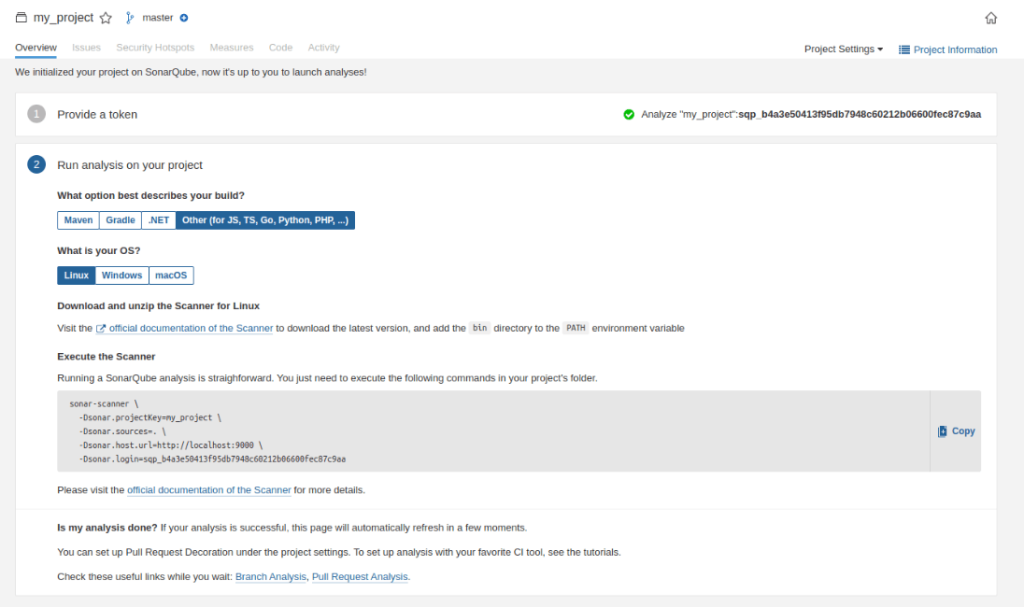
Now copy and execute the commands in your project directory and the screen looks like below

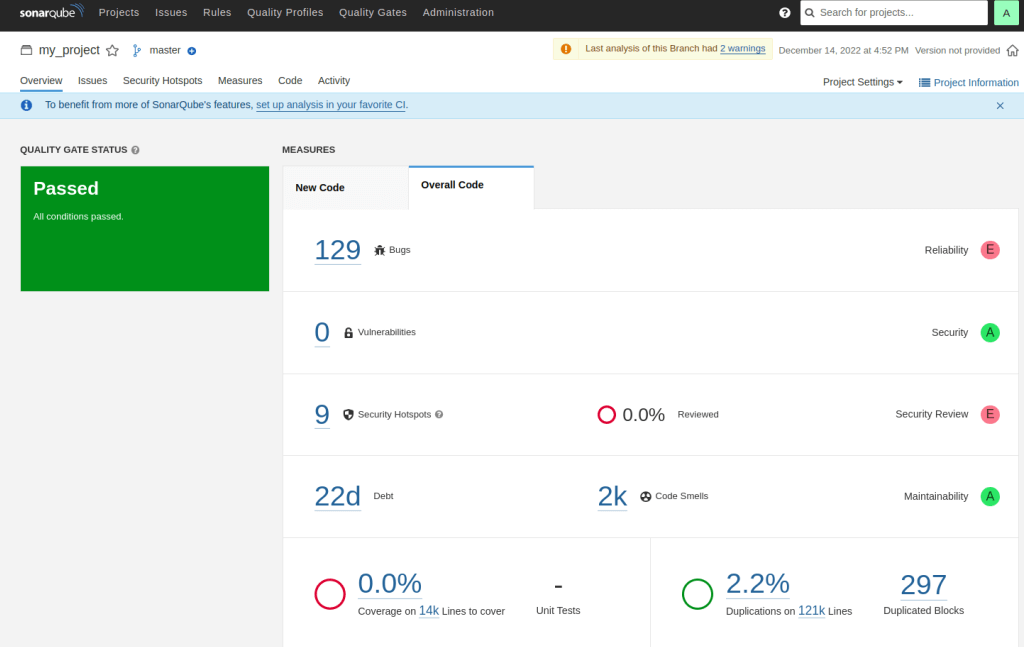
A Sonarqube server report will be generated such as shared below.
Conclusion
SonarQube is a powerful tool for static code analysis that can help improve the quality and security of your software projects. You can install Sonarqube with Docker or directly on a supported operating system machine. Installing SonarQube without Docker gives you more control over the server configuration and includes additional responsibilities and maintenance.
It also has some benefits, like having more control over the server configuration, but also it comes with more responsibilities and maintenance. It also requires you to run a compatible operating system with the version of Sonarqube.
For the hassle-free implementation of SonarQube without Docker, you can contact the Tntra product engineering team. Our teams are ready to take on a Sonarqube project that amplifies your digitization ambitions.

